使用 kubectl 连接 Google Cloud GKE
2023-02-23
为了方便快速熟悉 Kubernetes 相关功能特性,拥有一个私人的 Kubernetes 集群是非常方便的。一般在会推荐在本地使用 minikube,我也尝试过多次,不过还是有点委屈我的 16GB 的 Macbook Pro。年前在考 CKAD 时用 Google Cloud 免费的 300 刀直接创建了 GKE,本地 kubectl 直接连接使用非常方便。由于官方文档比较多,为了方便,当时记录了连接 GKE 的相关步骤及资料,希望对相关同学有所帮助。
1)安装 gcloud
cd /tmp
wget [<https://dl.google.com/dl/cloudsdk/channels/rapid/downloads/google-cloud-cli-413.0.0-darwin-x86_64.tar.gz>](<https://dl.google.com/dl/cloudsdk/channels/rapid/downloads/google-cloud-cli-413.0.0-darwin-x86_64.tar.gz>)
tar zxvf google-cloud-cli-413.0.0-darwin-x86_64.tar.gz -C ~/opt
~/opt/google-cloud-sdk/install.sh
~/opt/google-cloud-sdk/bin/gcloud init
2)安装 gke-gcloud-auth-plugin
~ gcloud container clusters get-credentials cluster-1 --zone us-central1-c --project my-project
Fetching cluster endpoint and auth data.
CRITICAL: ACTION REQUIRED: gke-gcloud-auth-plugin, which is needed for continued use of kubectl, was not found or is not executable. Install gke-gcloud-auth-plugin for use with kubectl by following <https://cloud.google.com/blog/products/containers-kubernetes/kubectl-auth-changes-in-gke>
kubeconfig entry generated for cluster-1.
➜  ~ gcloud components install gke-gcloud-auth-plugin

Your current Google Cloud CLI version is: 413.0.0
Installing components from version: 413.0.0

┌────────────────────────────────────────────┐
│    These components will be installed.     │
├────────────────────────┬─────────┬─────────┤
│          Name          │ Version │   Size  │
├────────────────────────┼─────────┼─────────┤
│ gke-gcloud-auth-plugin │   0.4.0 │ 7.5 MiB │
└────────────────────────┴─────────┴─────────┘

For the latest full release notes, please visit:
  <https://cloud.google.com/sdk/release_notes>

Do you want to continue (Y/n)?  Y

╔════════════════════════════════════════════════════════════╗
╠═ Creating update staging area                             ═╣
╠════════════════════════════════════════════════════════════╣
╠═ Installing: gke-gcloud-auth-plugin                       ═╣
╠════════════════════════════════════════════════════════════╣
╠═ Installing: gke-gcloud-auth-plugin                       ═╣
╠════════════════════════════════════════════════════════════╣
╠═ Creating backup and activating new installation          ═╣
╚════════════════════════════════════════════════════════════╝

Performing post processing steps...done.

Update done!
3)配置 kubectl
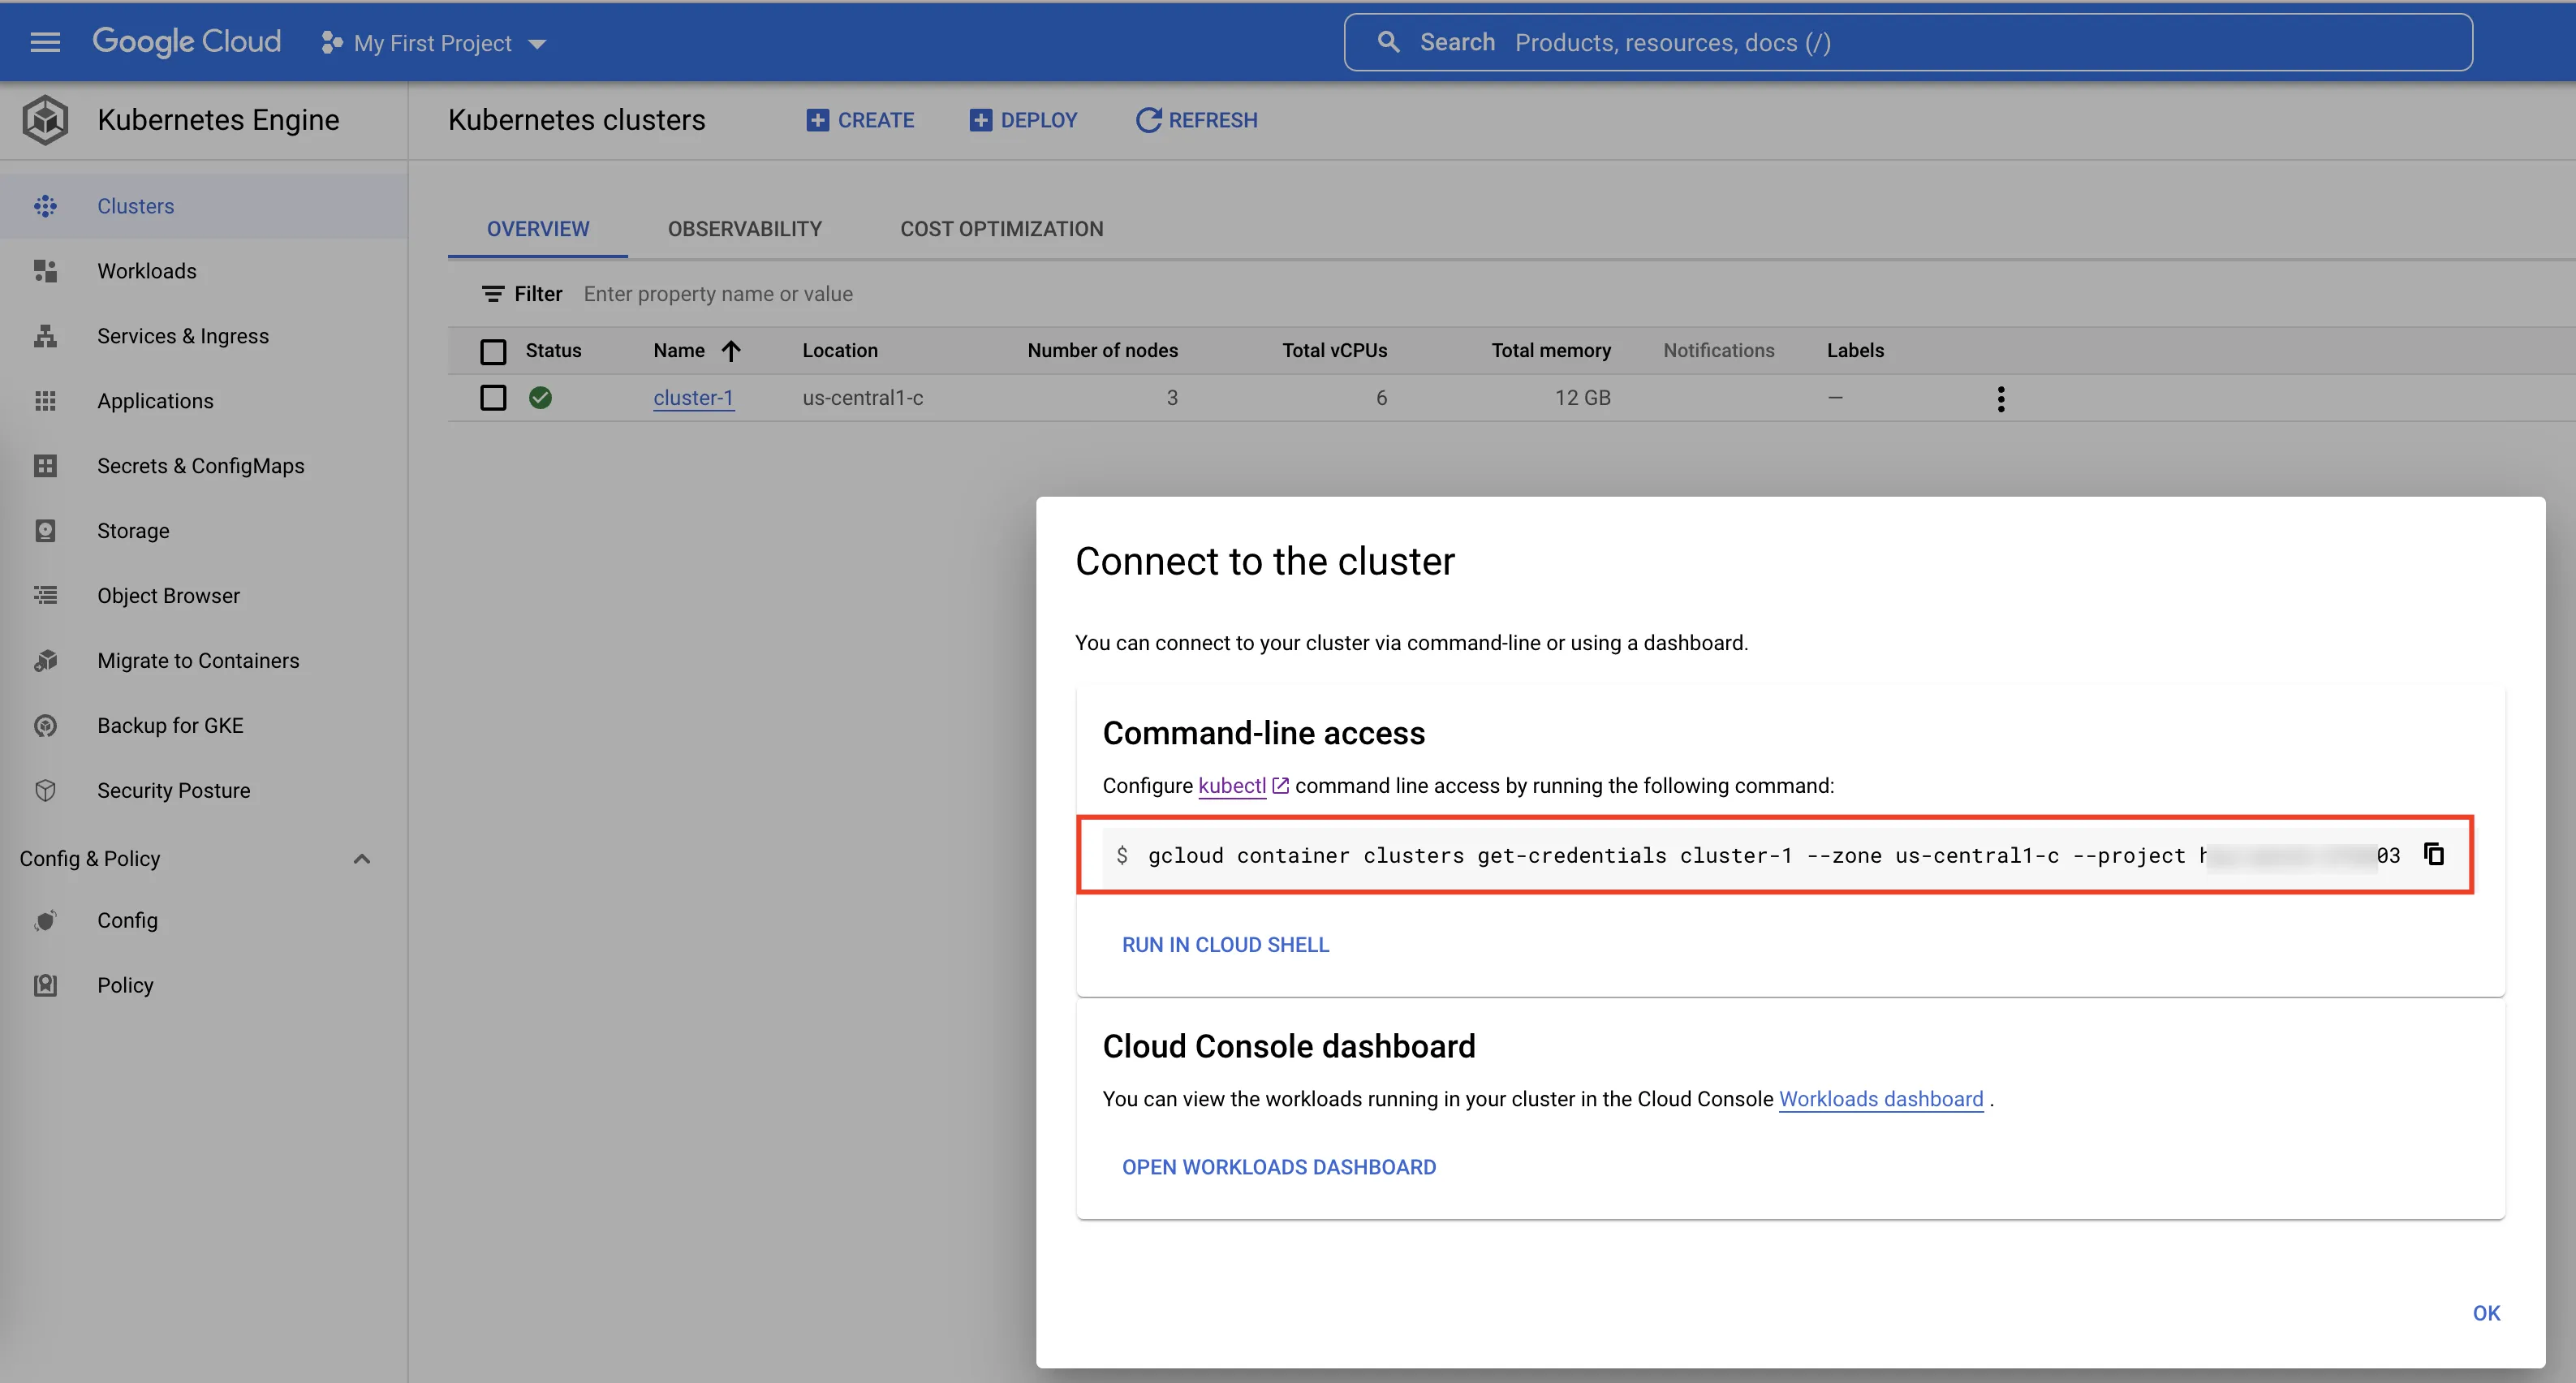
➜  ~ gcloud container clusters get-credentials cluster-1 --zone us-central1-c --project hip-watch-373203
Fetching cluster endpoint and auth data.
kubeconfig entry generated for cluster-1.
➜  ~
4)验证 kubectl 连接 GKE
这里推荐下 kubectx,对于多个 Kubernetes 集群切换非常方便,完成以上步骤操作后就能看到你的 GKE 集群了。
➜  ~ kubectx
gke_my-project_us-central1-c_cluster-1
➜  ~
再推荐下 ohmyzsh kubectl plugin,简化了很多 Kubernetes 命令行指令。以下命令查看当前集群 node 节点:
➜  ~ kgno
NAME                                       STATUS   ROLES    AGE     VERSION
gke-cluster-1-default-pool-f4635b04-2rr7   Ready    <none>   9m53s   v1.25.4-gke.2100
gke-cluster-1-default-pool-f4635b04-36lq   Ready    <none>   9m53s   v1.25.4-gke.2100
gke-cluster-1-default-pool-f4635b04-jzx5   Ready    <none>   9m53s   v1.25.4-gke.2100
➜  ~
运行一个 nginx pod,也可以查看已经可以正常使用。
➜  ~ k run nginx --image=nginx
pod/nginx created
➜  ~
➜  ~ kgp
NAME    READY   STATUS    RESTARTS   AGE
nginx   1/1     Running   0          6s
➜  ~